What is the Difference Between Re-pointing and Tuck-Pointing?
The simple answer is that tuck-pointing versus re-pointing is essentially the same thing. The words are often interchangeable in today’s vernacular. However, the word tuck-pointing refers to a specific method not commonly used today as such techniques are considered a heritage method.
Where original “tuck-pointing” techniques are concerned they refer to the following:
The end result is an illusion of an ultra-thin line of mortar between brick courses on a wall or a chimney.
This can be achieved when building a wall or chimney, rebuilding a wall or chimney, or when replicating an original heritage detail when repairing deficient brickwork.
The process is such that when filling a void course of joints; the mason would tint the mortar to similarly match the brick colour. Then the mason would pack the joint solidly to the exterior surface of the brick with the tinted mortar. Instead of using a spoon trowel to create an even, concave, recessed depth in the mortar; a v- trowel would be used to create a thin v-shaped inset into the mortar joint.
A thin line of lime mortar (which created a white, pinstriped appearance), would be installed into the v-groove of the original mortar application. This would be done prior to the original mortar pack completely curing and hardening.
To note is that during colonial times coarse sand would usually be utilized for the mortar pack and brick dust would be used as the tinting catalyst in the mortar mix. Lime dust would be the colour catalyst for a white mortar mix.
The practice was characteristic of colonial time masons who settled from the British Isles to the Eastern cities of the United States (then known as the Colonies). Examples of such work can be found on historical homes in cities like Baltimore, Boston, and New York.
This work method would be extraordinarily expensive in terms of present-day labour costs.
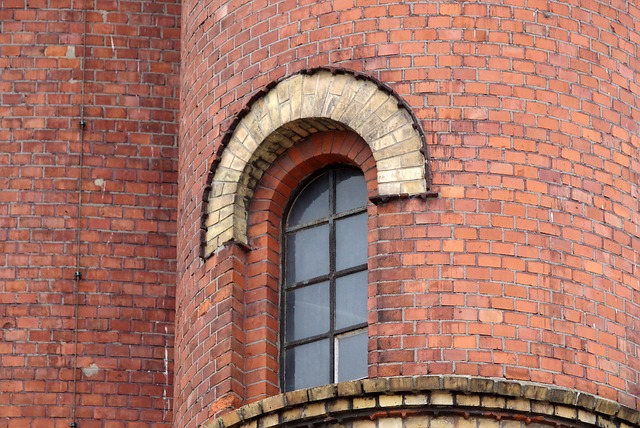
In general terms, tuck-pointing or re-pointing as one may prefer to call it; refers to the restoration of deficient mortar joints which have resulted from cracks in the mortar, voids in the mortar joints, and or in combination with replacing individual bricks which have been impacted by water ingress through the wall or chimney structure.
When one observes deficiency in the mortar joints, it can almost always be traced back to water ingress from some location. Common points of inspection for water ingress begin with the crown of the chimney.
The crown(or top) of the chimney is usually finished with a formed and poured cement cap. Other finishes include a pre-cast cement cap that uses “U” formations with filler pieces to permit installation between the protruding flue tiles.
A less sophisticated approach may be the use of cement which has been layered on top of the chimney and trowel-applied, to have a water shedding slope from the flu tiles as a high point, and sloping downward to the outer edges of the top of the chimney. (Not the most professional approach).
In such areas, cracks in the cement will permit water to enter the structure of the chimney. One should also inspect the flue chambers as mortar can deteriorate after many years due to exhausted flue gases resulting from wood or gas furnace exhausts.
The flu tiles should always have a rain cap to prevent water from getting inside the chimney flues.
If inspecting the exterior mortar joints for cracks in the mortar, or void mortar, it will signal water infiltration of the chimney due to extreme age deterioration, or poor masonry mix from the original building of the masonry structure. Efflourescense (white marks) on the exterior brickwork is assuredly a sign of water ingress.
To complete a proper re-pointing job involves removing the deficient mortar to a depth of a minimum of one and a half inches. Excess dust and debris must be cleaned well. The joint must be wet down prior to applying a fresh mortar pack. This is typically achieved by filling the joint using a pointing trowel and feeding the mortar of a hawk (hawd). Piping bags are often used to inject mortar into vertical void joints.
The mason will typically fill an area and let set after removing excess materials with a brick trowel.
Once the mortar is set some to some degree, one may use a slick or a spoon trowel to form a finished joint. The finished joint can be inset or may be tooled to be almost flush with the brick surface, depending on the design.
Part of the process can also involve sawing out and replacing individual bricks where the surface has crumbled and the glazed finish has been compromised. Where small areas are concerned this may be viable, however, if there are considerable areas involved; rebuilding the chimney structure or wall may be the preferred alternative for structural integrity.
The cement cap at the crown of the chimney needs to be comprehensively repaired to ensure there is no potential for water infiltration. This may require building a wooden form and pouring a new cement cap. The cement cap should be constructed to be proud of the brickwork beneath along all perimeters.
The addition of a preformed galvanized metal or copper cap can be employed under certain circumstances before the cement cap is poured. This acts as a secondary defense against water entering a chimney. The practice is often specified when constructing ornate chimneys. Parapet walls or corbel details.
Depending on the type of brick quality used, and the quality of mortar mixture; a re-pointed chimney or wall can last for decades. A newly constructed masonry chimney or wall should last upward of one hundred years. Factors such as pollution, sun, and weather exposure directions (usually south and west), can serve to provide the need for earlier maintenance intervention.
An experienced mason should be able to advise whether re-pointing is a viable option, as rebuilding is certainly a more labour and material-intensive proposition. The advantage of rebuilding comes into play
when more than fifty percent of the masonry structure is compromised, and or when the base of the chimney hidden beneath the roof flashing is rotten.
Many consumers make the mistake of hiring someone (typically as a lower-priced quote option); that repairs the chimney, only to discover within ten years of the investment, that the chimney needs to be completely rebuilt. This is because a proper inspection was not completed below the line of the chimney flashing.
At AVENUE ROAD MASONRY, we have the advantage of working with the roofing company AVENUE ROAD ROOFING®, who can deal with chimney flashing and roof flashing replacements in concert with our masonry restoration efforts.
To learn more about re-pointing and rebuilding of masonry chimneys, walls, and related masonry services, contact us or visit us at: www.avenueroadmasonry.com View us also on Facebook™ and Twitter™.